
Most insulin pump users are familiar with the dreaded occlusion alarm. At the simplest level it tells us that this cannula is occluded and needs to be replaced. But it’s not always that straightforward. So let’s dive in an explore the mysteries behind the alarm.
Detecting an occlusion
The pump usually has a force sensor in it which measures how hard it’s having to push the insulin out of the pump. Consider that the pump is trying to push insulin out of the reservoir, down the tubing, through the cannula, and into your body.
Ideally the pump pushes, the pressure goes up slightly and thus pushes some insulin out the into the body (with the pressure then returning to stasis). Obviously if there’s an absolute blockage somewhere along that path, nothing’s going to flow and the pressure will skyrocket.
But there are all sorts of things resisting that flow of insulin (even slightly). Such as:
- Friction within the reservoir (e.g. the plunger pressing against the walls of the reservoir).
- Friction/resistance of the insulin against the walls of the tubing/cannula/etc.
- Kinks and crimps in the tubing (for example where it gets squeezed by a belt buckle).
- Kinks in a teflon cannula (e.g. if it’s come loose and then been bent when getting pushed in, or been interfered with by a muscle group).
- Normal subcutaneous tissue gradually accepting the flow of insulin out of the cannula.
- Scar tissue and lipohypertrophy resisting the flow of insulin.
All of these things can add to the pressure detected inside the pump. Even in a normally-working system the pressure won’t be zero. Ideally the sensor is set to trigger when the flow is obviously blocked, but it can sometimes happen that all these little things add up to just enough to trigger the alarm.
 But it’s not only the infusion site that might be involved in the alarm!
A hard truth
Not every occlusion alarm is an actual occlusion.
Not every occlusion triggers an alarm.
The pumps do their best to give us an alarm when they detect something that might be an occlusion, but they’re not perfect. We still need to apply some insight and common sense.
Different pumps and thresholds
Most pumps’ occlusion detection works by having a pressure threshold.
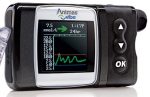 In the YpsoPump if the pressure (measured at the pump) exceeds 3.0 bar (300 kPa) the alarm is triggered. The Accu-Chek Combo triggers at 4.0 bar, and the Tandem t:slim X2 at 2 bar. The old Animas Vibe allowed us to choose “low” or “high” sensitivity without specifying the precise pressure.
Keep in mind at very low basal/bolus volumes it could take a very long time to reach these pressures, so the pump manuals always point out that a steadily-rising BG can also be an indicator.
The Medtronic pumps take a different tack in their documentation. The 770G lists it as being triggered by an average of 2.23U of missed insulin with at standard bolus speed, and 1.97U at quick bolus speed.
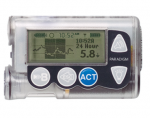 But despite the different documentation, the pump will still have a pressure sensor integrated into the reservoir piston mechanism. The earlier Paradigm pumps mentioned 2.77U of missed insulin, and definitely have a pressure sensor (apparently with an occlusion threshold of just under 1 bar).
The different specific instantaneous threshold pressures across pumps is probably related to changes in the rest of the design (remember there are multiple factors that can add to this pressure) and not just an arbitrary design choice.
Things we can do
There are things we can do to reduce the chances of getting occlusions. Hopefully these become part of your automatic routines if they haven’t already.
I think it’s not uncommon for people to go for years without encountering occlusion alarms and then all of a sudden get lots. It’s very frustrating, and it’s easy for us to blame the last thing that happened (e.g. a new pump, a different cannula type, a different type of insulin). But while these changes might have indeed contributed to the situation, often it’s only become an issue because we haven’t been careful overall, and the multitude of factors have finally added up to enough pressure to trigger the alarms.
1. “Air-pump” the reservoir
With the traditional plastic syringe-style reservoirs used in the Medtronic, Accu-Chek, and DANA pumps it can be important to prime (or “air-pump”) the reservoir before filling. That is, run the plunger up and down a few times to spread the lubricant from the O-rings. Do this every time, before putting insulin into the reservoir.
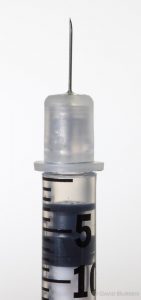
Priming is standard procedure for plastic syringes, and it’s essentially the same mechanism for a reservoir (but the pumps are more sensitive to resistance than someone manually depressing a syringe). Consider this image of a syringe. The black “rubber” (it’s a specialised polymer, but usually easiest to just call it “rubber”) presses against the sides of the cylinder, and there’s some lubricant there.
Especially if the syringe/reservoir has been sitting unused in storage for a long time, it can seem like it wants to stay in that position. It’s important to spread the lubricant out again. In some situations without doing that I’ve noticed added resistance as the plunger gets back to its original rest position, but never noticed it if the syringe has been “air-pumped”. Some people go so far as to twist the plunger so it goes up and down in a spiral to make sure the lubricant is spread evenly.
This “priming” of the lubricant is actually built in to the standard way of routine of filling reservoirs from 10ml vials, where we draw up air equivalent to the volume of insulin we’ll be extracting, and inject that into the vial. At that point we’ve done one pass in each direction before drawing insulin into the reservoir: voila!
Sometimes in other situations (such as when filling from insulin pens) people can forget this step. But it was part of my standard syringe use very early on, and when I started using a pump I kept doing the air-pump before drawing insulin from pen cartridges.
I don’t know if it’s as important for glass, but I have continued the habit with the glass YpsoPump reservoirs anyway.
2. Choose infusion sites carefully
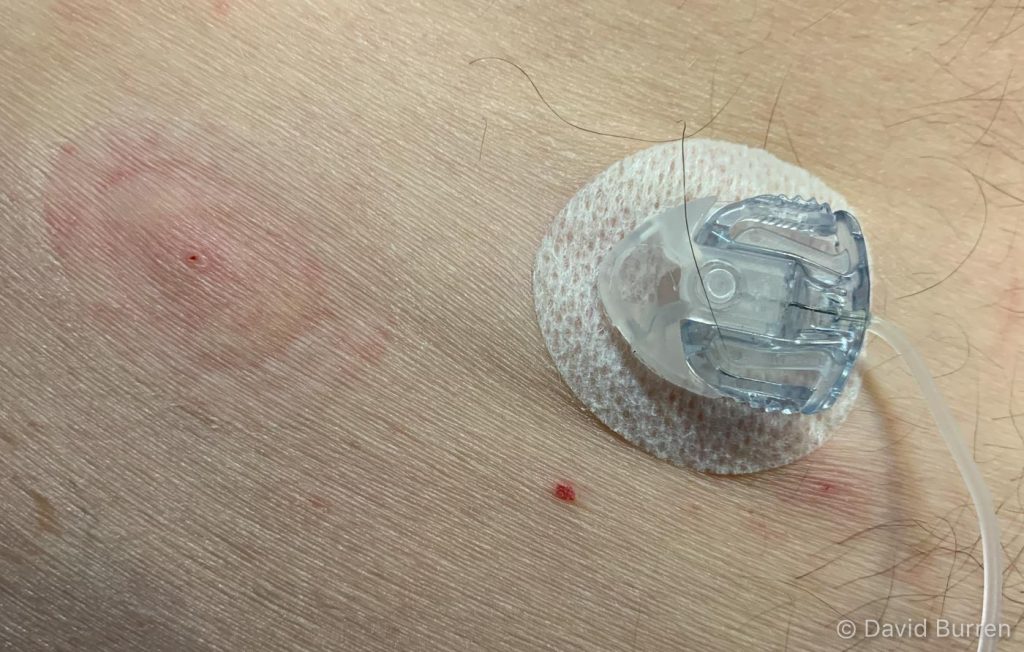
If we over-use sites (but leaving a cannula in for too long, as well as by coming back to the same site too often) we can begin to build up “scar tissue” under the skin. Partly lipohypertrophy from the continual infusion of insulin in the same area, but sometimes also damage caused by microtrauma (e.g. from the sharp end of a steel cannula).
If you’re having lots of occlusions, I would explore and see if they’re less frequent on new areas of skin. I call it “fresh real estate”.
Years ago I used to let my sites run to 4, 5, and even 6 days. It seemed that “they work fine”. But when I eventually started getting occlusion issues (as well as bleeding when removing sites) I changed my tune.
Today if it’s a teflon cannula I replace it somewhere around the 3-day mark and if it’s a steel cannula, around the 2-day mark. And each new site is placed a long way away from the previous (often a completely different area of the body, as I try to use a wide area). I have a map in my head of the old over-used areas that I still stay away from.
3. Insert teflon cannulae carefully
By its very nature, a flexible teflon cannula is not capable of pushing through flesh. It needs an “introducer needle” down its centre, which is withdrawn once the cannula is in place.
But if the cannula lifts slightly and then gets pushed back onto the skin, the tip of the cannula won’t be able to push back into the hole it previously occupied, and what can happen in that situation is a “kink” where the end of the cannula folds back on itself. This will definitely obstruct the flow of insulin!
Whenever inserting a teflon cannula I’m careful to (where possible) get the adhesive bonded to the skin before removing the introducer needle and before removing any inserter.
 With the Inset/Mio/AutoSoft90 style of infusion sites, this includes things like pressing gently on the white rear of the inserter (at the back of the needle) to ensure the adhesive has contacted the skin close to the cannula. Careful attention to the insertion technique can reduce the likelihood of kinks occurring.
And if the site comes loose, replace it rather than trying to push it back into the skin!
4. Initialise the tubing-site connection
With the Orbit sets (these can be used on Accu-Chek, DANA, and Ypsomed pumps) apparently it can help to rotate the tubing by 360˚ (especially after the first connection) to ensure the insulin flow is unrestricted. In product demonstration videos we see the 360˚ rotation happening after insertion, and it’s easy to assume that’s just “showing off” about that function. But if it provides a benefit in avoiding occlusion alarms, it won’t hurt to make a habit of doing it after insertion.
I’m not aware of similar “gotchas” with other infusion sets.
5. Don’t “crimp” the tubing
The first time I encountered an occlusion alarm on my Animas Vibe it turned out to be because the tubing was running under my belt and got squeezed by the edge of a buckle. I moved it to a different (smoother) area of my waistline and the problem went away.
It seems obvious, but be conscious of where the tubing is running and whether it’s going to get caught on (or in) things. Not tying it into knots would probably be a good idea too.
6. Manage dose volumes?
This is a bit harder to change, as we need the insulin that we need. But some people have found that using extended/combo/square-wave boluses to spread a huge bolus out over 15 minutes rather than dumping it all in now can reduce the likelihood of a false occlusion alarm.
This can also help avoid site leakage, “tunnelling”, etc.
7. Keep the pump clean
It is actually important to keep your pump reasonably clean. There are pressure valves on various pumps that work to keep water out but to equalise pressures throughout the pump.
On the Accu-Chek Combo it’s important to occasionally replace the reservoir cap (which has some of these valves in it). The manual says to replace it (and the battery cap) every 2 months, and if your pump is in warranty you get the Service Packs with these for free. You do need to ask for them.
The Tandem t:slim X2 is another example. Its “cartridge” is a sealed plastic box that contains a flexible bladder. As insulin is extracted from the bladder the space around it gets bigger, and air needs to get in. Otherwise it becomes a low-pressure zone that adds resistance to the pump operation.
All the little holes on the back of the pump are there for a reason. If they get gummed up with “pocket fluff” it will probably end up triggering false occlusion alarms.
A special note about Apidra
 This is just supposition, but bear with me while I explain. I think this is involved with why Apidra did not get TGA approval for pump use in Australia.
We found in 2018 that Apidra quickly turns to gel in the t:slim X2 pump, and observations were made by people with pharmacy and chemical training that this might be due to pressurisation of the insulin.  The t:slim has a tiny “micro-pump” which takes parcels of insulin from the bladder and pushes them out to the tubing. It’s quite possible that the localised pressure inside this pump mechanism is enough to trigger this physical change in Apidra. It’s always seemed like a logical explanation of why other pumps do not encounter the same problem.
Following on from that, consider a traditional “syringe-style” pump using Apidra. If it does encounter an occlusion for any reason, the Apidra in the system will have been pressurised more than normal. This may increase the likelihood of physical changes within the insulin leading to further occlusions throughout the system.
At the same time, Apidra is approved for use in pumps in other countries. But this issue might be involved with why the decision was made years ago to not approve it in Australia.
If I was still using Apidra, after any occlusion I would be prepared to replace the whole reservoir/tubing/cannula: not just the site.
Summing up
I hope this has helped give you ideas about how to avoid occlusions and alarms in your own pump use. It won’t always be possible of course, but if we can minimise them then so much the better!
Hopefully you’ve never had a major problem, and hopefully some of these things will help make it unlikely you get one in the future.
And hopefully if you do have issues with occlusion alarms, understanding some of the background may help in your interactions with the pump support staff by telephone.
You are a font of knowledge David. Thanks for all the occlusion info and ideas.
Great. Thank you!