I’m currently using Dexcom G5 CGM sensors, and like many people I’m self-funding it. In Australia there is rarely insurance cover for CGMs (and where there is, it’s only slight) or funding support for those of us over 20 years old. So we so what we can to cut the costs down. One of the most straightforward things is to use the sensors for longer than their 7-day warranty.
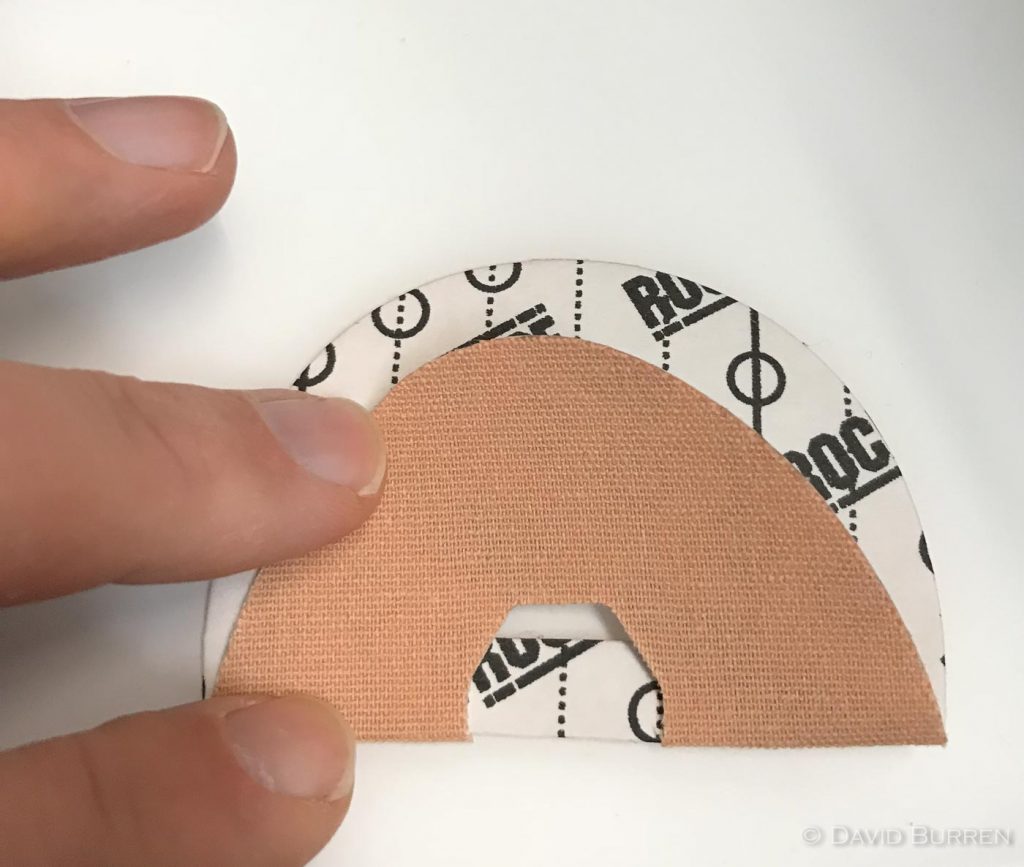
As soon as I insert a new sensor I apply a covering patch to help keep it in good condition. The ones I use are cut from RockTape (probably the leading brand of “kinesiology tape”) by RockaDex (who are a small family business in Western Australia supporting their child who has T1D). The specific ones I get are in a vague oval/egg shape, which I find last the longest for me as it’s the edges which lift first, and that’s exacerbated by having corners. There are versions with and without “overtape” in the centre. In the example here I’m using the “overtape” version.
Like most of my sensors this was planted in the back of my upper arm. Please excuse the variable quality of these “contortionist” photos!
On day 0, I applied the first patch.
On day 14, I replaced the patch as it was beginning to wear. It usually lasts me about 13 days.
On day 25, I decided it was time to replace it again. The sensor underneath was still reporting good clean values, and I wanted to preserve that for as long as possible.
As you can see in this photo the edges were starting to curl. I’d been wearing long-sleeved clingy fleece tops (it’s been winter here) and these do generally wear away at the tape. Before the tape caught on something and peeled back further (which would take the Dexcom sensor underneath with it) the time had come to replace it.

The first task was to cut a slice in the tape, starting at the hole in the middle and cutting up with the tip of some sharp scissors. The messy result can be seen here:
![]()
Unfortunately I’m missing the next photo in the sequence, but it’s then a simple case of peeling the RockTape back, always peeling away from or around the transmitter. Never towards the central transmitter, as that will lift the Dexcom tape.
With the tape removed, we can see the Dexcom sensor that was underneath, still attached quite securely and showing no sign of peeling. Keep in mind that when these photos were taken this sensor had been on for 25 days, which represents a big saving in cost over the warrantied 7-day life. Luckily I don’t have any allergy issues with the Dexcom adhesive.

The G5 transmitter in this case looks a little different to the regular ones, as it’s a Fenix unit which is a G5 modified with a rechargeable battery. But it’s exactly the same size and shape as one new out of the box from Dexcom.
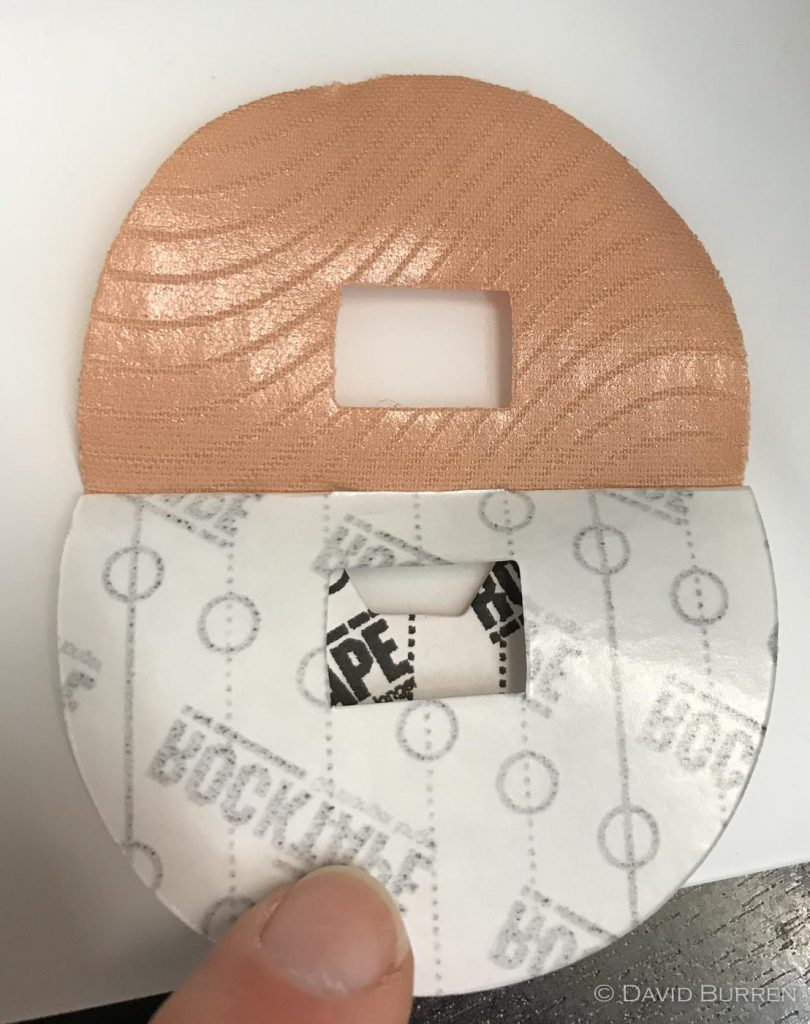
It’s then time to apply new tape. But the RockTape is very “grabby” and it’s easy to end up with a wrinkled mess. First I fold the patch and put a crease in it. You can see I don’t put the fold half-way, but rather so that the narrow end of the transmitter is on the “short” side of the fold.
Then I peel off the backing of the “fat” end. Because the backing paper was creased, it sits away from the sticky tape quite neatly.
It’s then possible to pick up the patch by the end that still has backing on it, and manipulate it into place. Here you can see I’ve positioned it so the fat end of the transmitter sits snugly into the matching end of the hole in the centre of the patch. Once I’ve got it all lined up I lightly press on part of the tape to hold it in place while I get ready for the next step.
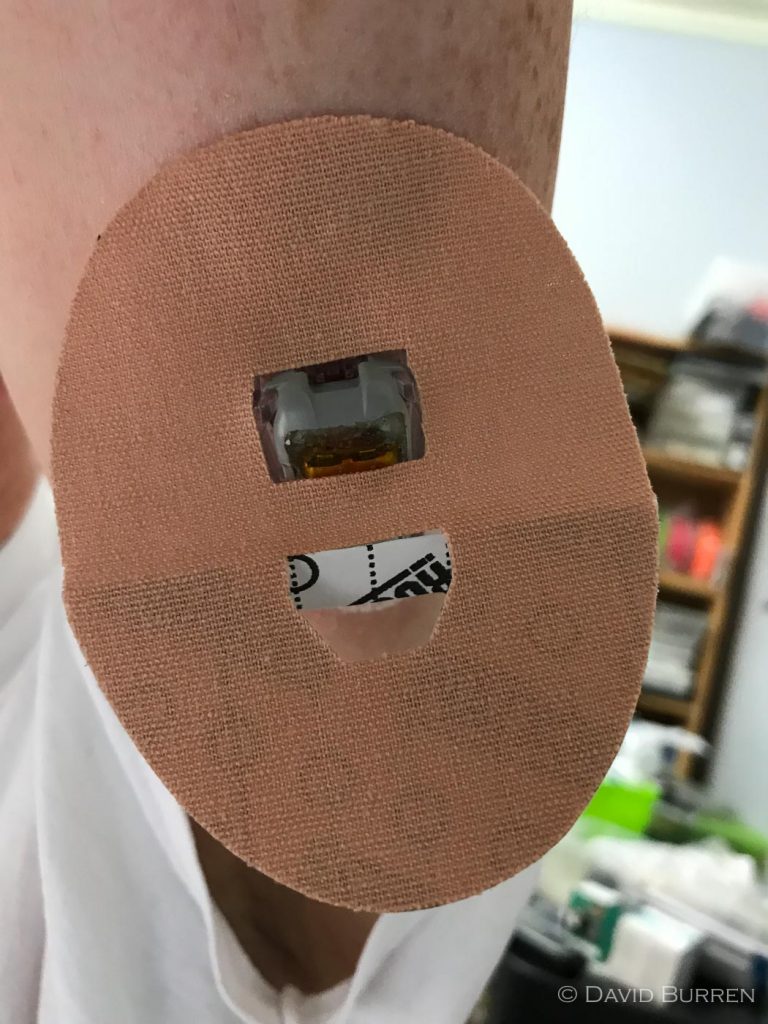
Now I can remove the rest of the backing paper, and then position the other end of the transmitter hole around the transmitter (made slightly more complex in this case by the “overtape” stripe in the centre). Then press the tape from the centre outwards, trying to get rid of any folds/bubbles and get it down neatly. You can see here I didn’t do as good a job at smoothing it out as the previous one.
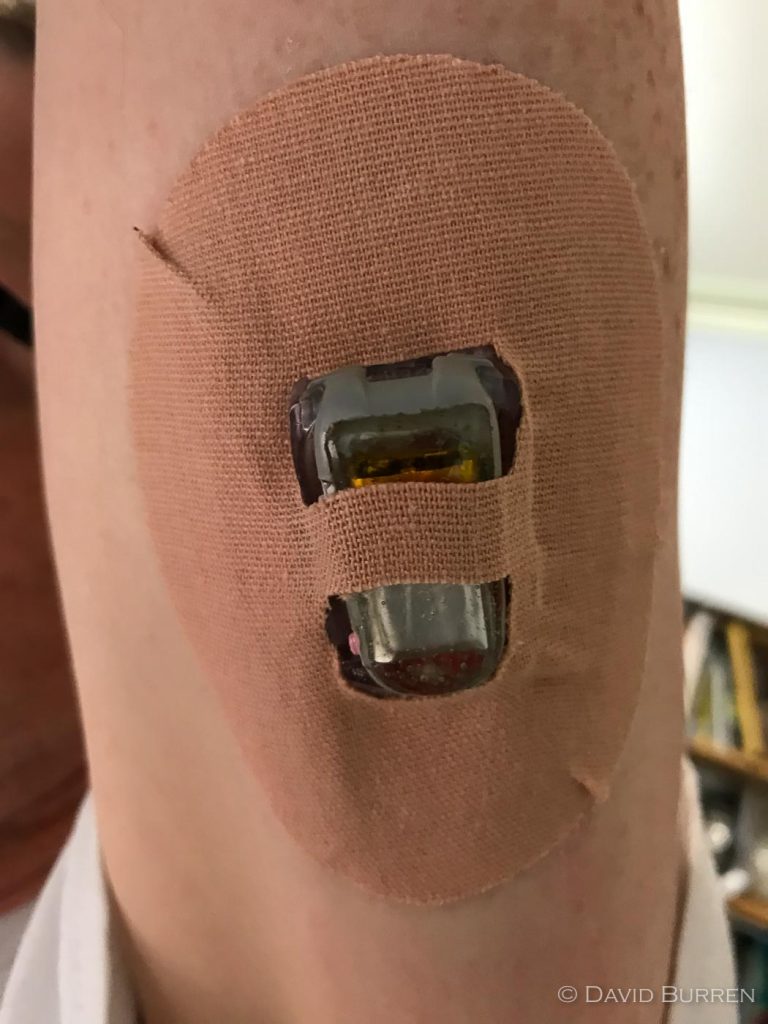
The RockTape adhesive bond is strengthened by body heat, so at this point I rub it with my fingertips to warm it up (or sometimes rub it with a warm laptop charger).
And then we’re done! Incidentally, I’m able to do this taping (as well as inserting new sensors) in the back of my arm by myself. Lifting my elbow as in these photos and using a mirror (or laptop webcam) to see what I’m doing, makes it possible.
How much longer this sensor continues to operate before the signal becomes “jittery” remains to be seen. Back in April I had one sensor last 39 days, but over the last year my average sensor lifespan has been 21 days. 7 days was the shortest, and that was only because I accidentally ripped the sensor off. The next-shortest was 13 days. I have friends who get longer lifespans (and some who get shorter) but we all do things like this to try to tame the astronomical costs of CGM.
David thNks for this great news about increasing longevity. I think we all need a T1D equipment dresser. To assist with attachment and adhesive application. It’s a nightmare. I hope to get to experience a transmitter and pump soon through your generous initiative. Maybe once I’ve understood the pump adequately I can look at a loop! Oh to have an intelligent artificial pancreas system.
Hi David, I’m thinking of switching from libre + miaomiao to a g5 and trying to guesstimate the cost. Getting 3 weeks average sensor life is better than the fixed 14.5 days i get from each libre for much the same price.
Just wondering how long you are able to get out of each g5 transmitter ?
The G5 transmitters are warrantied for 90 days, after which the Dexcom app gives you 3 weeks grace before they ignore the transmitter. That’s 112 days.
At that point you can either use Spike/xDrip+ (instead of the Dexcom app) which just keep running until the battery actually dies (which in some cases can be up to 180 days) or you can use a reset tool (such as Spike, xDrip+, or a standalone reset app for iPhone) to make the transmitter think it’s new, and the Dexcom app will talk to it again. Obviously there’s no warranty past the original 90 days.
At that point you can cut the original batteries out, replace with new ones, seal up again with epoxy, reset it, and have a “new” transmitter. Or you can get someone else to do that for you. Or buy a new warrantied transmitter for $540.
So, my own transmitter lifetime is “very long”.